Why and How to Join the Custom Golf Ferrule Craze
Unless you’re a serious golf gearhead, there’s a good chance you don’t even know the name of that little black ring between your shaft and the hosel of your club head. Well, it’s called a ferrule, and these days, it doesn’t have to be black.
Custom golf ferrules are becoming all the craze, and whether you want to add some personality to your clubs, support your favorite team, or you like practical solutions to pesky problems, there are actually some great reasons to add custom ferrules to your golf clubs.
What Are Custom Golf Ferrules?
The ferrule of a golf club is the piece that connects the hosel of the club head to the shaft. It serves as a transition piece and traditionally comes in black, sometimes with couple silver rings around it.
Custom ferrules bring a splash of color and personalization to your club. These ferrules come in all sorts of colors and even come in various lengths.
Brands like Matchstick Golf, BB&F Co., and Shaft Connect offer some seriously savory custom ferrules that you can sink your teeth into for a pretty small investment.
Why Use Custom Golf Ferrules?
Why is such a nuanced piece of the golf club becoming the most popular part to customize? Here are just a few of the reasons.
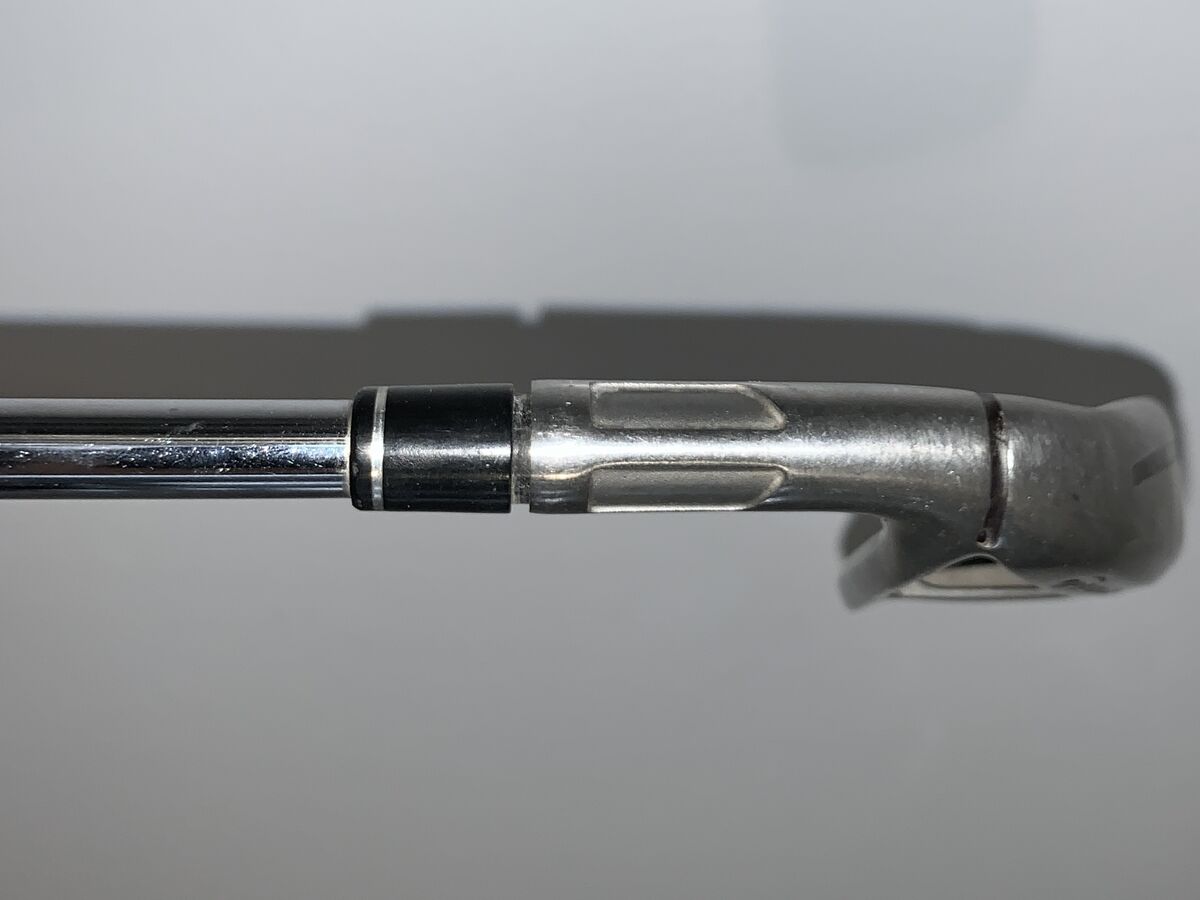
Ferrule detached from hosel
If you’ve used your irons or wedges for more than a couple years, there’s a good chance there are at least one or two ferrules coming loose from the hosel, leaving a small gap or maybe even spinning around the shaft. If it’s time to replace a few of your ferrules anyway, you've got a great excuse to upgrade your ferrule game.
Even if your ferrules are in immaculate condition, adding custom golf ferrules is a great way to differentiate between clubs. For example, my sand wedge and lob wedge are identical, except for the stamp on the sole indicating the loft. Seemingly every-other round, I grab the wrong wedge, not realizing it until it’s too late. A custom ferrule on one of those wedges is an instant differentiator, and I’ll never need to stand over another important shot wondering if I’m really holding my sand wedge.
All logic and reasoning aside, custom golf ferrules are just that, custom. They serve as a way to bring your personality to your golf clubs. Rep your favorite team or school’s colors, or simply add something unique to your clubs that nobody else in your group will have, but everyone will ask about.
If you’re already adding custom paint fill to your club head, a matching ferrule, and maybe even a grip, is an awesome way to make your customizations pop.
How to Install Custom Golf Ferrules: Step-by-Step Instructions
If you want to upgrade your clubs with custom ferrules, you can get your favorite ferrules and bring them, along with your clubs, to any club repair facility. Most golf courses, pro shops and retailers have the ability to swap out your ferrules, and the cost should be pretty low.
Or, if you already have some golf club repair tools, you can do it yourself. Here are some of the items you’ll need to complete this project.
|
Item |
Expected Cost |
Shop |
|
Heat gun or torch |
$20-25 |
|
|
Hosel brush |
$10-12 |
|
|
Club repair epoxy |
$8-10 |
|
|
Custom golf ferrules |
$15-30 |
Step 1: Find the Right Size
Before you begin, it's important to make sure you get the right size ferrules for your shaft. There are two common sizes, including .355 taper and .370 parallel. Look up the make and model of your clubs, and you can probably find the size you need in the club specs online.
Step 2: Pick Your Custom Ferrules
Shopping for your new custom ferrules is the most fun part of this whole process. Are you trying to show some love for your favorite team or alma mater? Do you want to differentiate some of your clubs? Are you searching for the hands-down coolest-looking custom ferrules out there? Figure out what you’re going for, then shop around.
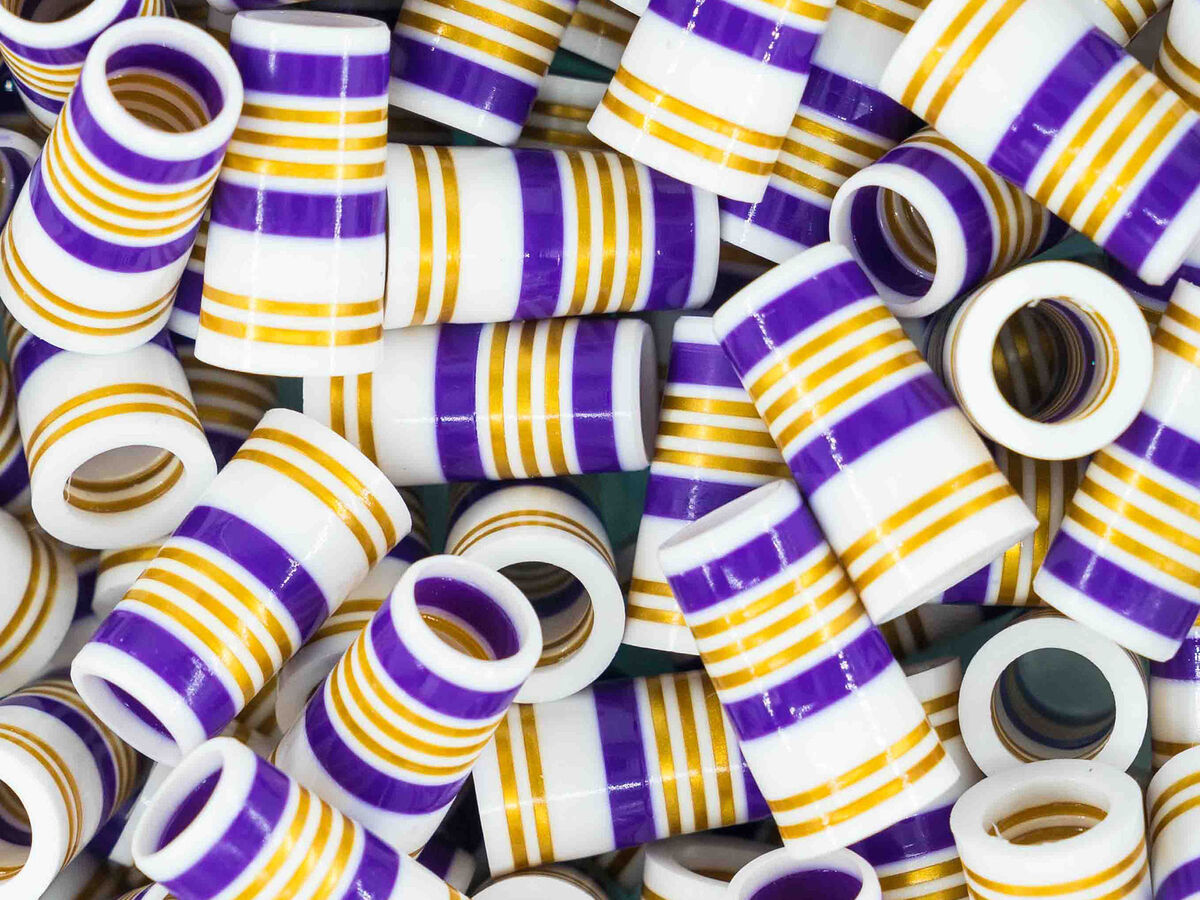
Matchstick Golf designed a ferrule specifically to pay tribute to the "Showtime" Lakers (top), a white ferrule with an unmistakable blend of purple stripes and gold bands. These days, it's easy to find custom ferrules that give a nod to your favorite squad.
Step 3: Remove your Club Head & Ferrule
Use the heat gun, or a butane torch, to soften the epoxy that connects the shaft to the hosel. Turn the club slowly as you apply heat, and within minutes the head should twist off.
The existing ferrule may come off easily once the club head is removed, but if not, you can use a blade to help remove it.
Step 4: Clean Everything
Once the club head is off the shaft, use the hosel brush to thoroughly clean all the dried epoxy out of the hosel of the club head. Then, remove all the glue from the shaft. If the glue is still warm, you may be able to wipe most of it away. Continue heating the epoxy carefully or use acetone to help remove any leftover residue. If you have a sanding belt, that can also be used with 80-grit sandpaper to clean all the epoxy off your shafts.
Step 5: Installing the Custom Ferrule
Mix your epoxy and roll the tip of your shaft in it. Next, coat the inside of the new ferrule in epoxy by sliding it around the shaft. Once you do this, your ferrule should slide easily onto the shaft. If you have a tip weight, dip it in epoxy and place it in the tip of the shaft. Then, use the club head to push the ferrule up the shaft into place.
Step 6: Re-Install the Club Head
After you use the club head to push the ferrule into place, slide the head off, and add another conservative layer of epoxy around the shaft. Put the head on the shaft, and with the butt of the club against the floor, use your body weight to push the club head firmly onto the shaft. If you want to use shaft beads, follow product instructions and mix them in with the epoxy as directed.
Once the club head and ferrule are securely in place, clean any residual epoxy between the head and ferrule, and ferrule and shaft. Tap the butt of the club against the ground to ensure everything is snugly in its proper position.
Next, ensure the grips are properly aligned. You have a couple minutes to get the head and grip lined up properly before the epoxy sets.
Finally, lean the club against a wall to dry for at least 24 hours.
Dos and Don’ts of Installing Custom Ferrules
Any time you start taking apart and rebuilding something as important and expensive as a golf club, you need to be extremely careful. If you’re unsure about installing ferrules yourself, it’s worth spending a few dollars to have a professional do it for you.
If you take this project on yourself, here are a couple dos and don’ts to help you along the way.
Dos:
- Confirm the diameter of the tip of your shaft, whether it is .355 taper or .370 parallel, and make sure your custom ferrules fit your shaft
- Practice on an old, spare club first before taking apart your primary clubs
- Make sure you have all of your supplies and everything is organized before you begin
- Label each shaft before removing the club heads so each shaft gets re-paired with the correct head
Don’ts:
- Don’t start taking your clubs apart if you need to use them in the next 24 hours
- Don’t begin the process until you know you have everything you need to finish
- Don’t skip important details like using the proper sized ferrule or keeping track of which shaft goes in which head
Customize Your Clubs
There’s a good chance the other three golfers in your group couldn’t even point to the ferrule on a golf club. Imagine their faces when you step up to the first tee with a set of custom ferrules.
Whether you make the upgrade yourself, or have a professional do it, custom golf ferrules are an awesome way to bring some color to your clubs.